

For my daughter’s graduation party, I wanted something that could serve a lot of people over the course of an afternoon and evening with little time and attention needed. A couple large pork shoulders (called pork butts) cooked in a pellet grill seemed like a great solution. Most of the preparation could take place the day before, and other things like pork could be left in the grill until needed without fear of the meat getting dry. However, once I started researching how to make pulled pork, I found that there are a number of different opinions on the “proper” way to make it. Pork butts are usually rather large making trying different techniques difficult in a household of one without wasting food. Therefore, I ended up finding some common themes across several different sources and focusing on those. The results were very good even from a complete novice.
I have make pulled pork a couple more times since the graduation party trying some different things, but not finding any major differences in the end result. The pork freezes well in 1qt vacuum-sealed freezer bags, and can be reheated in the microwave. While I may continue to try different things with the preparation or cooking method (such as in the oven), what is provided here is my current go-to technique.
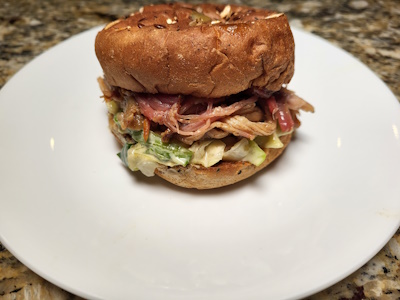
I call this a technique instead of a recipe as there are too many variables with the grill and size of the protein. The end result is very flexible in that you can use it in sandwiches with or without BBQ sauce (see Tangy BBQ Sauce) and/or Cole slaw (see Mustard Cole Slaw), add it to chili (see Three Bean Chili), toss it with some greens and vegetables for a pulled pork salad, or just eat it plain.
Ingredients
While a sample rub is provided, any rub of your choice may be used. The important part is to salt the pork
Rub
For a 5lb boneless pork butt, use 1 and 1/2t as 1 part.
- 3 parts kosher salt
- 4 parts smoked paprika
- 1 part granulated garlic
- 1 part granulated onion
- 1 part pepper
- 1 part turmeric
- 1/3 part cinnamon
Pulled Pork
- Pork butt (pork shoulder bone in or boneless)
- Yellow mustard
- Dry seasonings
- Water
- Apple cider vinegar
- Butter
- Brown sugar
Equipment
- This technique uses a Traeger pellet grill. Other pellet grills or smokers may be used.
Steps
- Trim al the fat, silver skin, and cartilage from a pork butt (shoulder). This can take some different approaches depending if it is bone in or not. Basically rub your hand around the meat to find “hard” parts then cut them off. Then cut off most fat from the “top” layer so that all sides show red meat. This can be a little weird on the “top” layer as there may be fat above the meat then a thin layer of meat followed by another layer of fat that should be removed. After that if the meat is bone-in then you may have to cut down the separation that makes it “bone-in” to remove more silver skin. See the References section for a good video on how to trim the pork.
- Cover all exposed surfaces of the pork with yellow mustard. Make sure to include any surfaces exposed when cutting into the pork to remove silver skin.
- Cover all exposed surfaces of the pork with a moderate coating of kosher salt then a heavy coating of the rub, (or just the rub if it contains salt). Let sit at room temperature for 30 minutes to an hour.
- Preheat the pellet grill to 250°F – 275°F / 120°C – 135°C with the extra smoke option enabled. Add a heat-proof container with an open top containing 2C or more of water. This is to provide some moisture inside the grill during cooking.
- Add some apple cider vinegar to a spray bottle, and spritz the outside of the pork with it. Place the pork in the grill fat side up, (although there should not be much fat left). Cook until the internal temperature of the pork reaches 165°F / 74°C, spraying the outside of the pork with apple cider vinegar every hour or two. Depending on the temperature of the grill, expect a 5lb pork butt to take about 3 – 4 hours to get to temperature.
- Remove the pork and place on two sheets of aluminum foil large enough to completely enclose the pork. More aluminum foil sheets may be used as needed, but the bottom sheets should be large enough to catch and hold all the juices from the pork.
- Rub brown sugar around the outside of the pork along with more rub (or just the rub if it contains sugar). Place a few slabs of butter on the top of the pork. Tightly wrap the entire pork trying to make sure that there are no ways for steam or juices to escape.
- Place the pork back in the grill turning off the extra smoke setting if needed, remove the water container, and cook until the internal temperature reaches at least 200°F / 93°C. This may take 2 hours for a 5lb pork butt. At this point the pork may stay in the grill until needed, possibly turning down the temperature to 225°F / 107°C. It does not matter if the internal temperature of the pork continues to rise and that may be desirable for even more tender meat. I am not sure how much it too high, but I served one that was 215°F / 107°C with no impact to the taste or tenderness.
- Remove the pork about 20 minutes before serving and unwrap the top to allow it to cool making sure not to lose any of the juices. The 20 minute wait time is just to allow the pork to cool enough so you can massage it with your hands. While you could use food-grade gloves over some insulating gloves and shred immediately, you may lose the ability to feel any hard pieces to remove during the shredding process.
- Place the pork in a rimmed baking tray and remove the bone if necessary. It should easily pull out. Then massage the pork with your hands breaking it apart. Remove any hard bits or silver skin.
- Pour the juices into the pan and mix with the pork until the juices are fully incorporated.
References
I pulled information from too many YouTube videos and other sources when learning how to make pulled pork to list them all, (plus I lost track of them). However, the ones given here is the one I leaned on the most. The first is the cooking technique and the second is the trimming technique.